About
The Pleebie Jeebies Immediate In-App Updater for Google Play asset is for getting your application to check for an available update of your Android app on the Google Play Store. The custom plugin and associated script will notify the user of an available update from within your app and give them the option of installing it.
The main functions of this asset are:
- Automatically check for an available update on the Google Play Store or via a button from within your application
- Uses a native Android overlay for the update process showing the update details, including total size of the update, download progress as it downloads and installation progress once the download has completed
Note: When you publish your app as an Android App Bundle, the maximum allowed compressed download size of an app using in-app updates is 150MB. In-app updates are not compatible with apps that use APK expansion files (.obb files).
After careful consideration, this asset was depreciated in December of 2025 to focus resources on our core strategic principles.Asset Files Hierarchy
All files are located under Assets/PleebieJeebies/ InAppUpdater/ (no spaces)
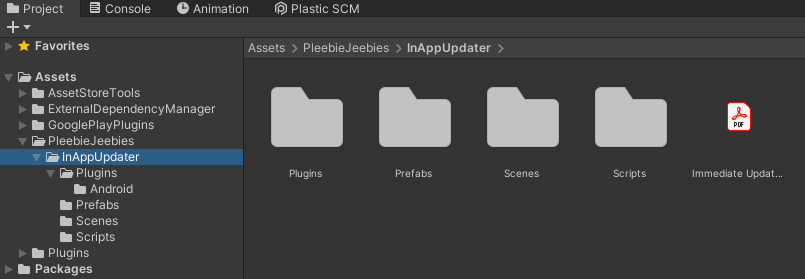
Plugins Folder
The Plugins/Android/ folder contains the native Android plugin library with a .txt file that contains all the proguard rules. You should include these rules in your proguard file if you are using proguard rules in your project.
Prefabs Folder
The Prefabs/ folder has two prefabs. One is the Immediate Updater prefab. Drag and drop this prefab into your project to use the asset. The other prefab is the UpdateButtonPopup prefab, use this only if you want to use a button inside your app to check for updates. If you just want automatic updates on app launch then all you need is the Immediate Updater prefab.
Scenes Folder
The Scenes/ folder contains a simple demo scene that has both automatic updates and a button for manually checking updates implemented.
Scripts Folder
The Scripts/ folder has three scripts. The ImmediateUpdater script handles the main functionality of this asset. The MenuController script is just for the quit button in the demo scene. The PopupController script handles the functionality of the manual update button in the demo scene and the associated popups.
Installation
- Download the asset from the Unity Editor Package Manager window (Window > Package Manager from the Unity Editor toolbar)
- Import the asset package into your project
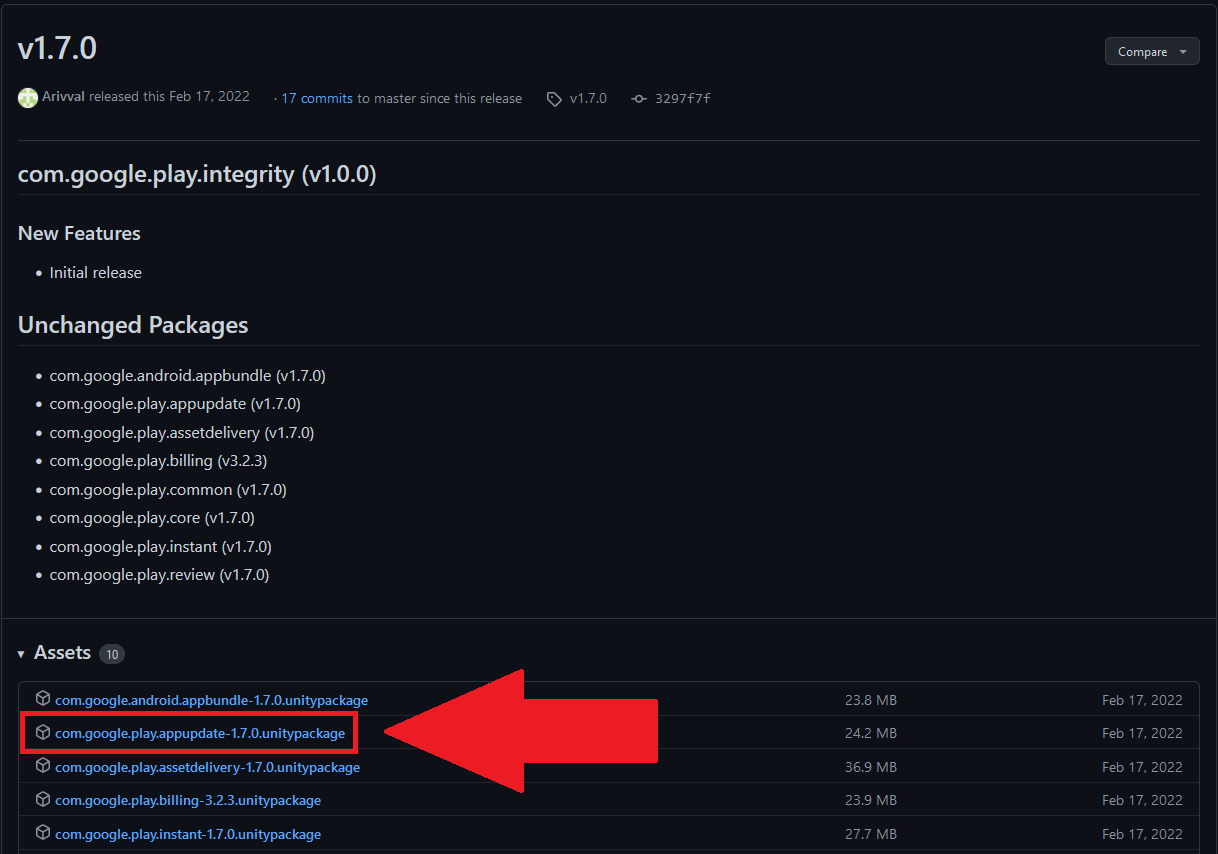
- Download the package App Update (com.google.play.appupdate-1.7.0.unitypackage) from Google: Google Github Play Core 1.7
- Import the entirety of the Play In-App Update package in to your project, which will include the External Dependency Manager
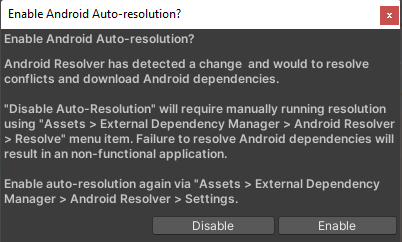
- Depending on the version, you may see a popup requesting to Enable Android Auto-resolution; enable this to resolve any dependencies
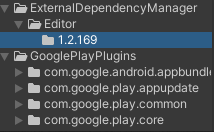
- You should end up with the following GooglePlayPlugins as well as the ExternalDependencyManager Editor version 1.2.169, future or past versions are not yet supported
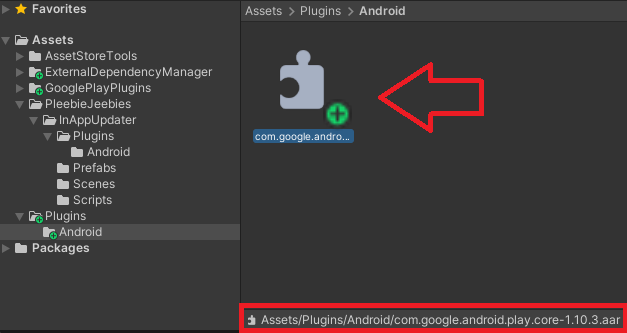
- After resolving dependencies, you should also end up with the android plugin com.google.android.play.core-1.10.3.aar. Without the proper files, the updater will not work
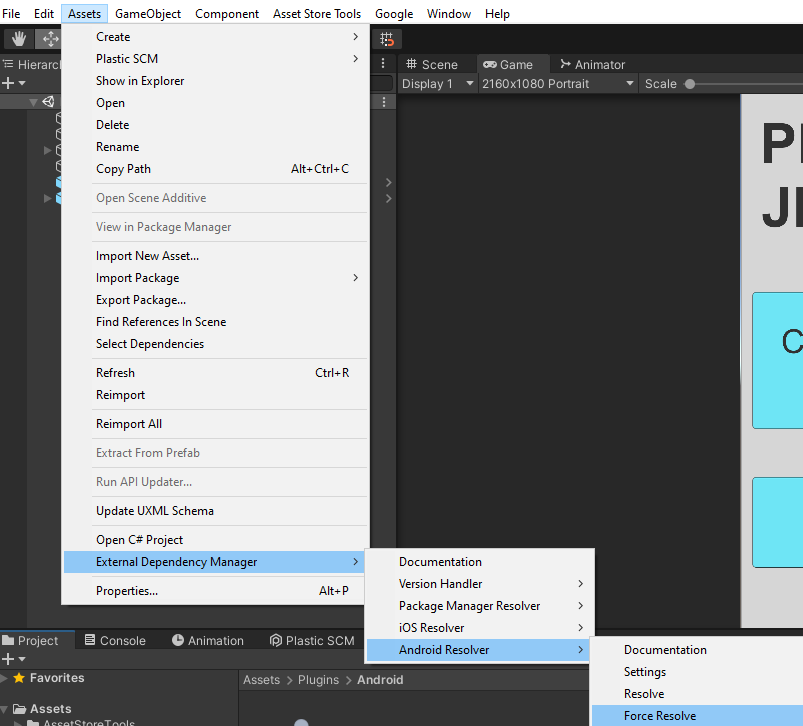
- If the resolver didn’t obtain the play core file, you can attempt to force it with: Assets > External Dependency Manager > Android Resolver > Force Resolve
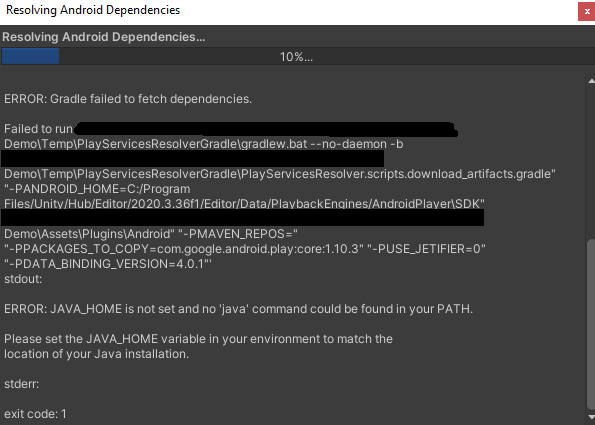
- The resolver can cause errors, one I receive in Unity 2020.3.36f1 is:
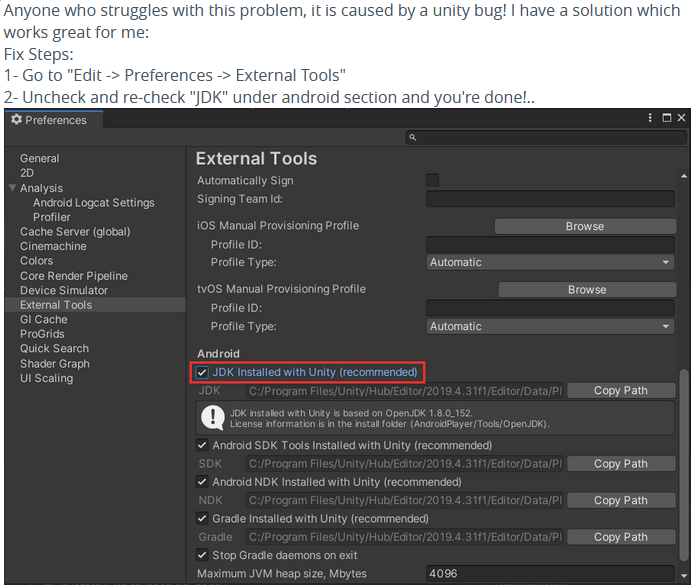
- The way I was able to resolve this issue:
- After unchecking and re-checking, you can attempt to Force Resolve Android Dependencies again, which should give you the file necessary to update properly
- Once you have the proper files listed in this section, namely the android plugin com.google.android.play.core-1.10.3.aar that is all you need to do. See configuration on how to use the asset in your project
Configuration
Default Configuration
Configuration of this asset is very simple. Automatic updates are on by default. To turn them off, just un-check the box labelled Check For Update On Start in the inspector.
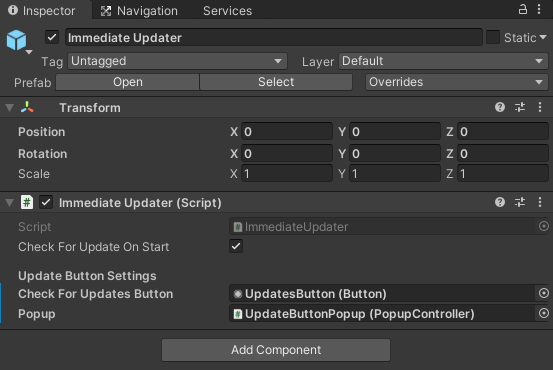
If you wish to use the popup system that is in the demo scene, just drag in the UpdatePopupButton prefab into the scene and link your Button and the PopupController to the fields on the Immediate Updater prefab in the inspector.
Custom Buttons
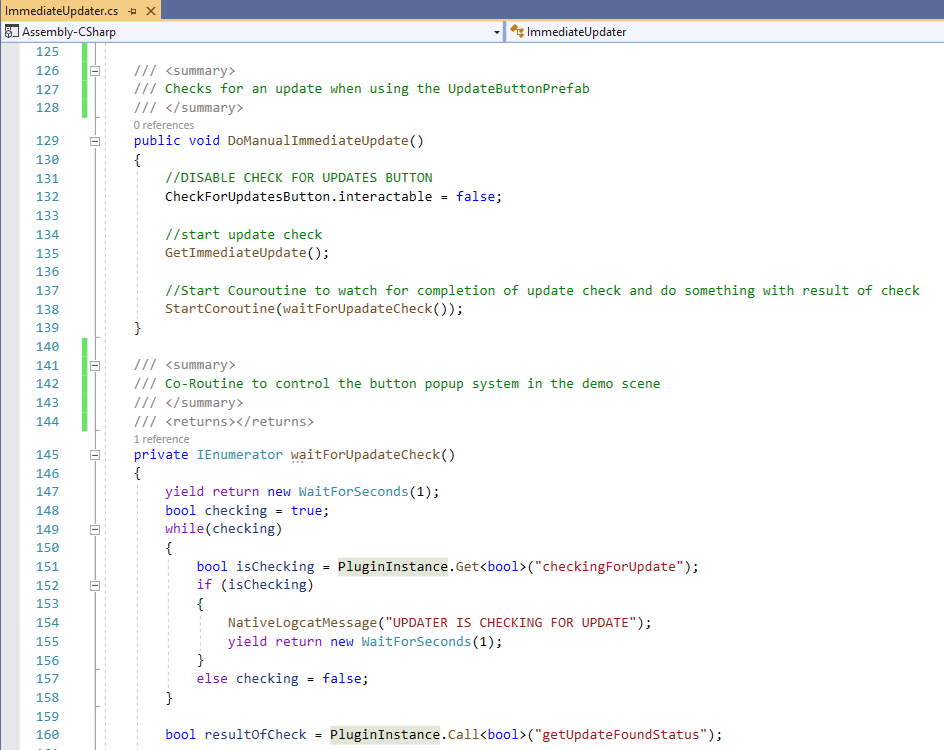
If you wish to create your own button system from scratch to check for an update, then in the ImmediateUpdater script you will find a method called ManualUpdate(). This method can be called by your custom button to initiate a check for an update.

Below the ManualUpdate() Method are also the two methods used by the button system in the demo scene; edit these if you just wish to change the behavior of the demo scene button system.
Testing without Play App Signing
If Play App Signing is not enabled for your app which means that you are using your own keystore to upload and distribute your app or game to users via Google Play Store, then the easiest way to test the update functionality is to build an apk / app bundle directly from Unity and install on your test device, but keep in mind that you have these requirements:
- In-app updates are available only to user accounts that own the app. So, make sure the account you’re using has downloaded your app from Google Play at least once before using the account to test in-app updates.
- Make sure that the app that you are testing in-app updates with has the same application ID / package name
- Because Google Play can only update an app to a higher version code, make sure the app you are testing has a lower version code than the update version code.
- Make sure the account is eligible and the Google Play cache is up to date. To do so, while logged into the Google Play Store account on the test device, proceed as follows:
- Make sure you completely close the Google Play Store App
- Open the Google Play Store app and go to the My Apps & Games tab
- If the app you are testing doesn’t appear with an available update, check that you’ve properly set up your testing tracks
Testing with Play App Signing
If Play App Signing is enabled for your app, you can test the integration in two ways.
First by uploading apk / app bundle files directly to the Play Store Console in the Alpha channel and use this channel to download the update and test the app. The downside of this method is that you will have to update your versionCode every time when you want to test changes in the integration. If it's not a big deal for you I would prefer to go with this way.
Second way is by using the Internal App-Sharing option from the Play Store Console. You can read more about it here: Google Play Android Support
With this method, on your test device, make sure you've already installed a version of your app that meets the following requirements:
- The app was installed using an internal app sharing URL
- Supports in-app updates
- Uses a version code that's lower than the updated version of your app
Follow the Play Console instructions on how to share your app internally. Make sure you upload a version of your app that uses a version code that's higher than the one you have already installed on the test device.
On the test device, only click the internal app-sharing link for the updated version of your app. Do not install the app from the Google Play Store page you see after clicking the link.
Open the app from the device's app drawer or home screen. The update should now be available to your app, and you can test your implementation of in-app updates.
You can read more about this topic in Google's documentation: Google Guide to Internal App Sharing
Frequently Asked Questions (FAQ)
Q: “Running the Updater on the Unity Editor is giving me an error, what’s the issue?”
A: The Pleebie Jeebies In-App Updater is designed to be used only on an android device which is using Google Play Store for the app. It is expected to throw errors in the Unity editor. Following the installation and testing process carefully should result in an app which will update upon one being available to the user. See About for more information or one of the above testing sections on how to test the Updater in your app.
Q: “I’ve followed the test process, but my app is not updating, what’s the issue?”
A: There are a number of possibilities:
- It could be that you didn’t update your app version before trying to test. The update won’t be triggered unless the version attempting to be updated is above the version installed. Or if you already updated your app via the Google Play Store, there won’t be an available update for the Updater to trigger.
- If it is not your testing process, it is likely that you haven’t properly imported all files which are necessary for the Updater. See Installation for everything necessary and other possible issues.
If you are experiencing any issues, contact our support team at: support@pleebiejeebies.com
